1.0 Installation
Materials / Pre-Setup:
- USB Flash drive
- Machine with minimum requirements
- To make a Proxmox Cluster - 2 minimum, but 3 machines are preferred (for fault tolerance and high availability)
- Understand the schema of your network (i.e. IP subnet, default gateway, etc.)
Installing Proxmox
- Download Proxmox Virtual Environment onto any system that you're working with
- Create a bootable USB download using a USB Creation Tool (multiple approaches stated below)
- Rufus (Windows)
- Ventoy (Windows, macOS, Linux)
- UNetbootin (Windows, macOS, Linux)
EXAMPLE USING RUFUS:
-
Insert the newly created USB bootable into the machine that will act as a designated Proxmox server and proceed with installation as you would any other OS installation (may have to change BIOS settings to boot to USB first)
Installer Configurations
*PAT= placeholder name
Once you get to the Proxmox Installer, you'll be prompted with multiple things - examples/suggestions are given below:
- Choose "Install Proxmox VE (Terminal UI)"
- Hostname (FQDN): PAT.local (use different names if you're trying to cluster - doesn't matter what you name it)
- IP Address (CIDR): x.x.x.x/y (e.g. 10.10.0.100/16)
- Gateway Address: x.x.x.x.1
- DNS Server Address: x.x.x.1 (public DNS servers: Cloudflare - 8.8.8.8, Google - 1.1.1.1)
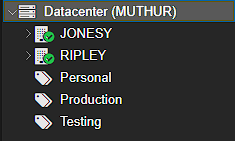
EXAMPLE OF WHAT IT WILL LOOK LIKE AFTER CONFIGURATIONS:

In this Proxmox example, the node names follows a theme from the Alien franchise
Last Updated: 2/20/2025
BY: Lilian & Vivian
