1.0 Installation
Materials / Pre-Setup:
- USB Flash drive
- Machine with minimum requirements
- To make a Proxmox Cluster - 2 minimum, but 3 machines are preferred (for fault tolerance and high availability)
- Understand the schema of your network (i.e. IP subnet, default gateway, etc.)
Installing Proxmox
- Download Proxmox Virtual Environment onto any system that you're working with
- Create a bootable USB download using a USB Creation Tool (multiple approaches stated below)
- Rufus (Windows)
- Ventoy (Windows, macOS, Linux)
- UNetbootin (Windows, macOS, Linux)
EXAMPLE USING RUFUS:
-
Insert the newly created USB bootable into the machine that will act as a designated Proxmox server and proceed with installation as you would any other OS installation (may have to change BIOS settings to boot to USB first)
Installer Configurations
Once you get to the Proxmox Installer, you'll be prompted with multiple things - examples/suggestions are given below:
- Choose "Install Proxmox VE (Terminal UI)"
- Hostname (FQDN): [PVE NAME].local (use different names if you're trying to cluster - doesn't matter what you name it)
- IP Address (CIDR): [IP ADDRESS CIDR] (e.g. 10.0.0.100/16)
- Gateway Address: [DEFAULT GATEWAY] (e.g. 10.0.0.1)
- DNS Server Address: [DNS SERVER] (i.e. 10.0.0.1 or public DNS servers: Cloudflare - 8.8.8.8, Google - 1.1.1.1)
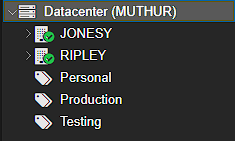
EXAMPLE OF WHAT IT WILL LOOK LIKE AFTER CONFIGURATIONS:

In this Proxmox example, the node names follows a theme from the Alien franchise
Last Updated: 2/22/2025
Contributors: Lilian, Vivian
